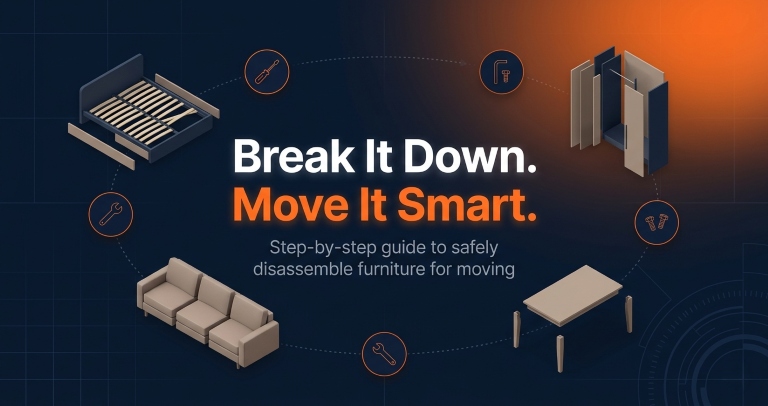
How to Disassemble Furniture for Moving: A Step-by-Step Guide
You have packed every box, wrapped every fragile item, and arranged the moving truck — and then you realise the king-size bed frame simply will not fit through the bedroom door. Or the six-seater sofa refuses to turn the corner of the staircase. This is one of the most common and frustrating moments in any home relocation.
Knowing how to disassemble furniture for moving properly solves this problem completely. It allows you to move moving large heavy items through narrow doors and tight hallways in smaller, manageable parts — without damaging the furniture, the walls, or your own back. In this step-by-step guide, you will learn the exact tools you need, how to disassemble a bed, sofa, wardrobe, dining table, desk, and chairs safely, safety precautions to follow, and simple tips that make reassembly easy at your new home.
Tools You Need to Disassemble Furniture for Moving
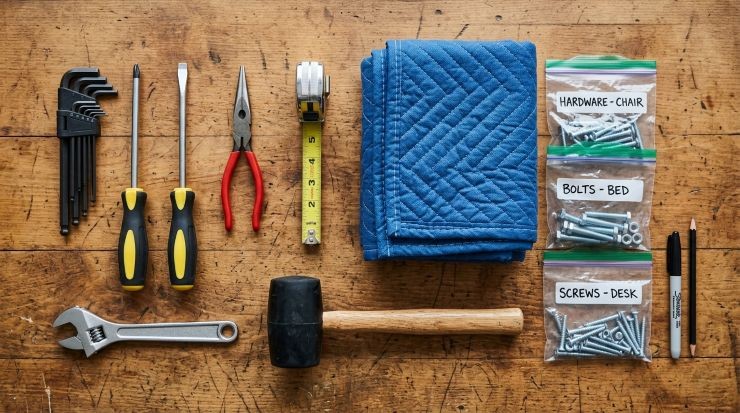
Before you touch any furniture, gather these tools and keep them in one place:
- Phillips head screwdriver
- Flat-head screwdriver
- Allen key set (hex keys)
- Adjustable wrench
- Rubber mallet
- Needle-nose pliers
- Resealable zip-lock bags (multiple sizes)
- Permanent marker and masking tape
- Moving blankets or old bedsheets
- Smartphone (photograph before disassembling)
Having the right tools ready saves time and prevents stripped screws, broken fittings, and unnecessary frustration. With everything in place, here is how to disassemble each piece of furniture for moving.
How to Disassemble Different Types of Furniture for Moving
Every piece of furniture is different — but the approach is always the same. Work from the outside in. Remove attachments before panels. Keep all hardware together and labeled. And never rush.
How to Disassemble a Bed Frame for Moving
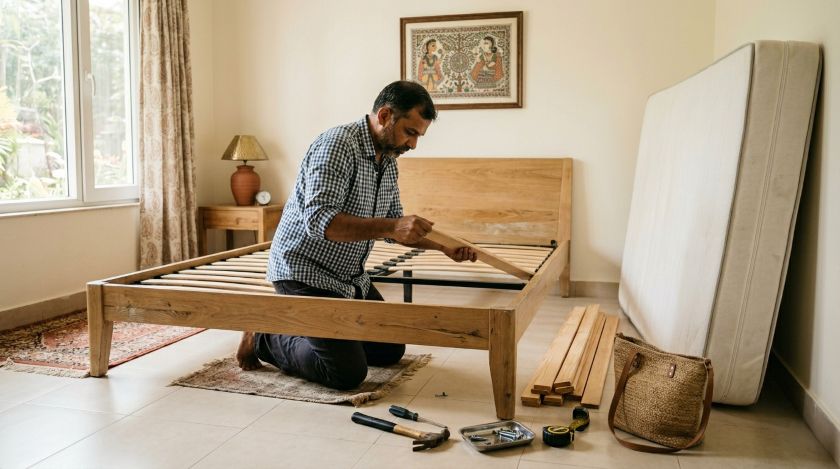
Disassembling a bed frame is usually the first and largest task in any home relocation. Here is how to do it correctly.
Remove all bedding — sheets, pillows, duvet covers, and mattress protectors. Set them aside for laundering before packing.
Lift the mattress off the frame and stand it upright against a wall. If you have a box spring or divan base, remove that next. Both should be wrapped separately in mattress bags or moving blankets.
Most bed frames have wooden slats that simply lift out. Remove them one by one and bundle them together with rope or tape. Label the bundle "Bed Slats."
Unscrew the bolts connecting the headboard and footboard to the side rails. Place all screws, bolts, and washers immediately into a resealable bag. Write "Bed — Headboard Bolts" on the bag with a permanent marker.
For wooden frames, unscrew the side rails and separate them. For metal frames with hook-in connectors, lift and unhook each rail from the corner posts. If your metal frame is lightweight and folds flat, you can leave it intact.
How to Disassemble a Sofa for Moving
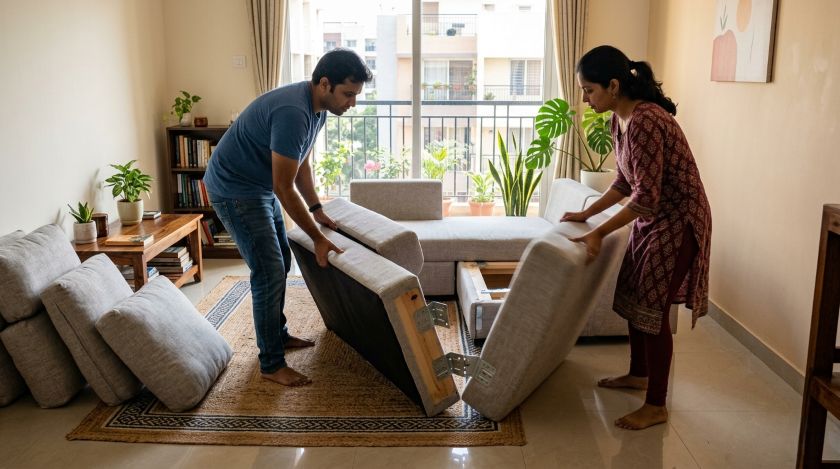
Before you begin, check what type of sofa you have. Modular and sectional sofas can be separated into individual pieces. Unibody sofas — those built as a single frame — cannot be structurally disassembled.
For modular or sectional sofas:
Take off every cushion, headrest, and removable pad. These can be individually wrapped in clean bin bags or pillowcases to protect the fabric.
Look underneath and along the inner edges of each section. Sectional sofas use metal clips or bracket connectors to hold sections together. Unclip or unscrew these connectors and store the hardware in a labeled bag.
Once the connectors are removed, gently pull the sections apart. Most sectional sofas split into 2–4 independent pieces that can be moved individually through doorways.
Almost all sofa legs unscrew directly from the base — turn anti-clockwise. Keep all legs together in one bag labeled "Sofa Legs."
How to Disassemble a Wardrobe for Moving
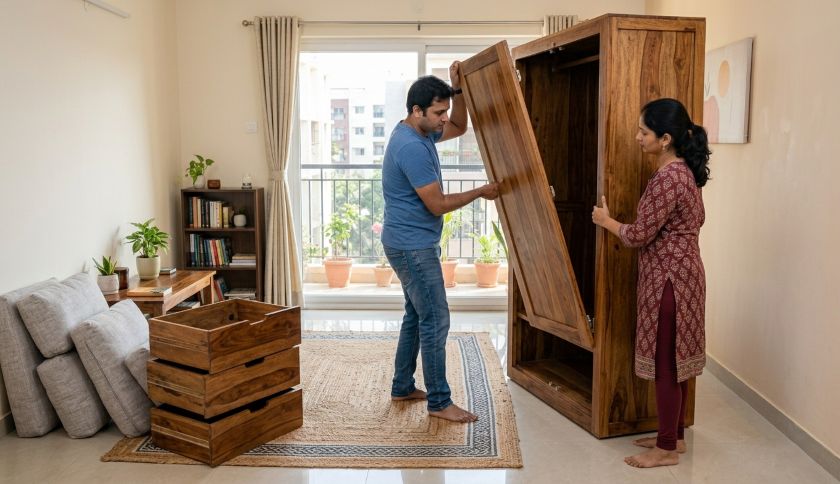
Wardrobes and almirahs are among the heaviest and most difficult pieces to move intact. Disassembling them is almost always the right decision.
Remove all clothing, accessories, and stored items from every shelf, drawer, and hanging section. Do not attempt to move a wardrobe with anything inside — even a light load significantly increases instability.
Pull each drawer fully out and set them aside. Drawers that slide freely during transit can fall, crack, or damage the frame and surrounding furniture.
Most wardrobe doors hang on lift-off hinges. Simply lift each door upward off the hinge pin and set it flat. Label each door "Left" or "Right" with masking tape to simplify reassembly. Store the hinge screws in a labeled bag.
Most internal shelves rest on peg supports — lift them straight out. Clothing rods usually unclip at each end. Bundle rods together and keep shelf pegs in a clearly labeled bag.
Flat-pack wardrobes (such as those from IKEA or similar brands) are held together by cam locks, bolts, and wooden dowels. Use an Allen key or screwdriver to release each connection, working from the top down. The side panels, top panel, back panel, and base will each separate cleanly.
How to Disassemble a Dining Table for Moving
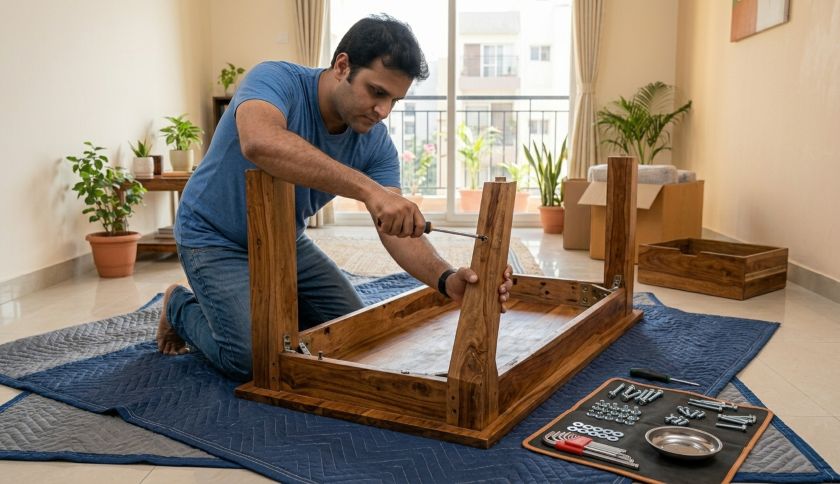
Dining tables vary widely in design, but the disassembly principle is consistent: remove extensions first, then legs, and protect the tabletop last.
Slide out any extension leaves from the centre or ends of the table. Wrap each leaf individually in a moving blanket or thick towel. choosing the right types of packing materials makes a significant difference in protecting furniture surfaces during transit. Do not stack leaves together unwrapped — they will scratch each other.
Flip the table upside down onto a moving blanket and unscrew each leg. Wrap each leg individually and store all leg hardware in a bag labeled "Dining Table — Leg Bolts."
Protecting a Glass Tabletop for Moving
Apply strips of masking tape in an X pattern across the entire glass surface. This reinforces the glass and, in the event of cracking, keeps the fragments contained rather than scattered. Wrap the tabletop in moving blankets first — then add a layer of bubble wrap over the top. The blankets prevent the bubble wrap from leaving impressions on the glass surface. Place the wrapped glass upright in the moving vehicle — never lay it flat. Label the package clearly: FRAGILE — GLASS — THIS SIDE UP.
Protecting a Wooden Tabletop for Moving
Apply a thin coat of furniture wax to the wooden surface before wrapping — this creates a protective barrier against abrasion. Wrap the tabletop in moving blankets and pay particular attention to the corners and edges, as these are the most likely points of impact damage. Secure the blankets with packing tape on the outside only — never apply tape directly to the wood surface.
How to Disassemble a Desk for Moving
Desks — particularly computer desks, study tables, and standing desks — have more components than they appear to at first glance.
Empty every drawer completely. Pull each drawer fully out of the desk body and set aside. Drawers left inside a desk during transit can jam, warp, or cause structural damage.
Some desks have a glass writing surface or glass side panels. Remove these carefully and wrap them individually using the same method described for glass tabletops above.
If this is a computer or standing desk with built-in cable trays, power strips, or routing channels — photograph the full setup from multiple angles before removing anything. This saves considerable reassembly time.
Most desk legs bolt to the underside of the desktop. Flip the desk over onto a moving blanket and unscrew each leg. For L-shaped desks, there is often a central support bracket — remove this last, after the legs.
Once the legs and attachments are removed, wrap the desktop in a moving blanket and secure with tape on the outside.
How to Disassemble Chairs for Moving
Most dining chairs and accent chairs can be partially or fully disassembled with a single screwdriver.
Turn the chair upside down. Unscrew each leg from the seat base. Keep all screws and bolts for each chair in an individual bag — do not mix hardware from different chairs, as sizing can vary.
Some chair designs allow the armrests to unscrew from the seat and backrest frame. Check for screws on the underside of each armrest.
Wrap legs in packing paper before adding bubble wrap or stretch wrap. Packing paper first is important for wooden legs — it prevents moisture from collecting under plastic wrapping, which can damage the wood finish over time. Wrap the chair body — seat and backrest — last.
Safety Tips to Follow When Disassembling Furniture
Disassembling furniture incorrectly is one of the most common causes of moving day injuries and property damage. Follow these six safety rules every time.
Always wear thick work gloves when handling glass panels, sharp metal brackets, or heavy wooden panels. A single slip on an unprotected glass edge can cause serious injury.
Wardrobes, large bed frames, and dining tables require two people minimum. One person holds and stabilises; the other unscrews and removes.
Remove rugs, close unnecessary doors, and create a clear path from the furniture to the exit. Tripping over an obstacle while carrying a panel is a serious risk.
Glass shelves, glass doors, and glass tabletops should be detached and wrapped before you shift the furniture even one centimetre.
The moment you remove screws or bolts, they go into a bag. A bag that is labeled "Wardrobe — Shelf Pegs" thirty seconds after the pegs are removed will save you an hour of confusion at reassembly.
Always remove attachments and upper components first. Removing a base panel before the upper structure is unsupported is how panels tip over and cause injuries.
How to Make Reassembly Easy at Your New Home
Making reassembly easy starts before you disassemble a single bolt. The decisions you make during disassembly directly determine how quickly and accurately your furniture goes back together in your new home.
Take clear photos of every piece of furniture from the front, back, and both sides before disassembly begins. Close-up photos of corner joints, bracket connections, and cable arrangements are especially valuable.
Write the furniture name AND the specific component on every bag. "Bed — Headboard Bolts" is useful. "Screws" is useless.
All bags, all panels, all components belonging to one item should go into a single clearly marked box or bundle. Never mix parts from different pieces.
If you have the original instruction booklet, keep it. If not, photograph the disassembled layout before packing. Most flat-pack furniture manuals are also available as PDF downloads from the manufacturer's website.
Carry all components to the intended room before reassembling. Trying to move a half-built wardrobe through a doorway defeats the entire purpose of disassembly.
Frequently Asked Questions About Furniture Disassembly
Final Thoughts on Disassembling Furniture for Moving
Knowing how to disassemble furniture for moving is a skill that makes every home relocation significantly easier, faster, and safer. With the right tools, a step-by-step approach for each furniture type, and careful labeling of every component, most people can handle furniture disassembly confidently on their own — without damage to the furniture or the property. Once disassembled, follow these steps on how to move furniture easily to complete the process.
The key is preparation. Start disassembly the day before the move, work methodically, and never skip the labeling step. When reassembly day arrives, your photographs and labeled bags will do all the hard work for you.
If you are planning a home relocation and need trusted professional support, AssureShift connects you with verified packers and movers across India. Compare quotes, read genuine reviews, and book with complete confidence.
Right tools
Photo first
Label bags
Work in pairs
Day before
Top to bottom
Planning a Home Relocation?
Let AssureShift connect you with verified, professional packers and movers across India. Get multiple quotes, compare services, and move with confidence.